My blog has been moved to ariya.ofilabs.com.

Wednesday, May 20, 2009

Chrome Experiments, Flash-killer, Monster Evolution

These days I am juggling balls. Beside fixing QtWebKit-related bugs, writing more examples on using QtWebKit, I am helping the Kinetic guys with Graphics View optimizations, and working on new Graphics View feature I still can't elaborate (sorry for the teaser :-). On top of that, I already started to work on Qt Script, learning the intricacies of JavaScript along the way, stress-testing Kent's Qt Script binding generators, and surely also playing around with the brand-new Qt Script debugger in Qt 4.5. For the latter, even if you are not really into Qt Script, I highly recommend giving it a try, at least watch the screencast from Kent for a start.

Unless you stayed under the rock for the last few weeks, you already heard about Chrome Experiments. These are some extremely cool demos designed to run in a web browser. Of course, there are already tons of demos out there. Chrome Experiments are however different. It relies on a high-performance browser. The reason: the demo is JavaScript intensive and thus a blazing-fast JavaScript engine will make a different. Coupled with the use of HTML 5 Canvas, some of demos simply show many things which are not possible before. Flash will be still here to stay (due to its authoring tools, advanced features, libraries collections, and so on). But I won't be too surprised if this is going to be a Flash-killer technology. There is O3D but I reckon it tackles a different market segment.

My favorite Chrome Experiment is Monster Evolution, an fantastic demo written by Dean McNamee. Try to launch it in your browser (warning: extremely slow if you don't use state-of-the-art browser). Or just watch the YouTube video. Impressive, isn't it?

When I saw Monster demo for the time, I thought it would be cool to be able to run it as a Qt application. Porting the demo from JavaScript to C++/Qt is one way to do it, but to make the challenge even more painful, I decided to run the monster.js code directly (warning: it's minified, better check Dean's open-source 3-D engine behind the demo). There are tons of ways to do, I almost tried every possible permutations. In the end, I managed to run Monster Evolution smoothly, at more than 25 fps on a fairly modern machine. What was to be just a quick hack turned into a struggling but delirious adventure, resulting in a three-installment series.

For the YouTube generation, here is the time-lapsed screencast (if you prefer, grab the 3 MB AVI).

In the first part, The QtScript Menace, I used Qt's built-in ECMAScript interpreter to run the demo. The performance was not my main concern (though it gave me the chance of using our work-in-progress Qt Script version that uses JavaScriptCore as the back-end), rather the trick on how to run it with as little code as possible. I ended up with a hackish pure JavaScript implementation of the canvas object, along with few lines of glue code, using Qt Script's feature of making a QObject instance available to the script engine. Surprisingly, it works pretty well. It downloads the JavaScript code from the Internet, setups some stuff and then runs it. For a program comprises 240 lines of C++ and 140 line of JavaScript, I am pretty happy.

For the second attempt, Attack of the SquirrelFish, JavaScriptCore was chosen as the engine that powers the demo, used via QtWebKit. Again the same trick was employed, with the glue code now relies on QWebFrame's addToJavaScriptWindowObject and evaluateJavaScript. This requires only minimal changes, with an improved performance as the result (significant and noticeable), especially when JIT is available.

The saga was closed with the third episode, Revenge of the Cylinders. This time the victim was V8, the JavaScript engine which powers Google Chrome. Again, the code change was minimal, consider that V8 glue code to this little Qt application needs to be written manually. Of course this requires you to build V8, I have included the instructions (works on Linux, Mac, Windows) in the accompanying README on how to do that.

Feel free to try all three methods and let us know the frame-per-second speed-up that you get!

Monday, May 18, 2009

the daylight seems to want you just as much as I want you

Like I wrote before, last week I was in Florence for the third installment of Pycon Italia.

I must admit, it was absolutely a fantastic event, so kudos to the the organizer! Everything went without glitches, the auditorium was spacious, coffee breaks and lunch were without compromise. And thanks to our lovely translators, we have on-the-fly, quasi real-time translations both English-to-Italian and Italian-to-English. I guess this is something any others non-English conferences need to copy, it was definitely awesome to be able to follow few talks presented in Italian. Of course, I need to say that it gives a different feeling (for a Python conference) when some VIPs like Guido von Rossum and Alex Martelli were there.

Both my Advanced Graphics Programming with PyQt and David's PyQt for Desktop and Embedded Devices were well received. Things could still have been better, for example I had this funny voice due to my hay fever (which was fortunately cured faster thanks to the Italian warm weather) and I did not realize that I packed too much stuff in the talks. Still, we are pretty content with the way it went. Before you ask, according to the organizer, some time in the future the slides and the video will be available online.

Needless to say, the conference participants were friendly and very passionate. And it was good to meet Enrico again. I also met Matteo whose Qt examples show up from time to time on Planet Qt. We also finally got to know Giovanni and his colleagues from Develer, which was the main drive behind the conference organization. We met a lot of other fellows as well, including KDE evangelists from Salerno. It is still a shame I forgot almost all of my basic Italian, I need to ensure I must polish it before I go to Pycon Quattro.

Beside the conference, Florence proves to be as good as what people say about it. It is beautiful. Amazingly beautiful. And of course, the most important of it, the food was great, as great as it could be. Being a fan of Italian culinary I did sample few excellent dishes, like Pappa al pomodoro and spaghetti frutti di mare. Having dinner outside, in a narrow passage, with happy children running around you, did indeed give a surrealistic atmosphere.

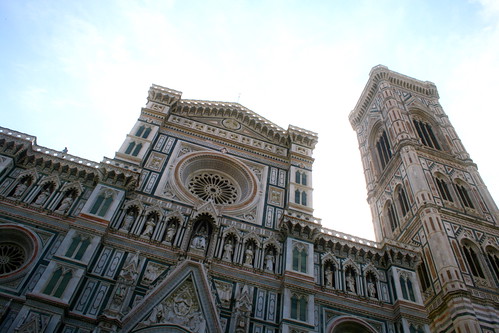
The obligatory picture of the grandeur facade of the Basilica di Santa Maria del Fiore, the central tourist attraction in Florence, follows:

The Cathedral in Florence

But nothing is more breath-taking than walking next to the river, reaching Ponte Vecchio, enjoying its stunning beauty at night, just on last Saturday when it was exactly full moon!

For more conference-related pictures, check out PyCon Tre Flickr group.

Wednesday, May 06, 2009

PyCon Italia Tre, Firenze

Like I mentioned before, I will spend the next few days in Florence (Italy) for PyCon Italia. I'm preparing my slides and demos, including few things I never posted before (premier show, yay!), for the Advanced Graphics Programming with PyQt talk.

According to our flight schedule, tomorrow afternoon David and I shall be in Florence already; so anyone who want to have a chat, drop me an email (ariya.hidayat AT gmail DOT com).

Tuesday, April 28, 2009

transparent QWebView and QWebPage

Seems that the trick to make a transparent QWebView or QWebPage is not very well known. So here is the magic incantation:

    view = new QWebView(this);
    QPalette palette = view->palette();
    palette.setBrush(QPalette::Base, Qt::transparent);
    view->page()->setPalette(palette);
    view->setAttribute(Qt::WA_OpaquePaintEvent, false);

Or grab it at http://gist.github.com/103126.

Here is the result (click to zoom). I put the famous TuxKiller wallpaper as the background for the main window. The central widget is set to a QWebView instance, using the transparent trick. As everyone loves Cube these days, that is the URL I am loading:

Note 1: of course this does not work if the web page explicitly sets the background color. For example, google.com (see its HTML source) forces a white background.

Note 2: with Qt 4.4's QtWebKit, you have to use the background brush instead of the base brush. This is changed in Qt 4.5 for consistency with the rest of Qt (it is mentioned in Qt 4.5.0 changes file).

Friday, April 24, 2009

quattro cinque uno

Fresh from the oven: Qt 4.5.1, Qt Creator 1.1, new SDK.

Details on what has changed can be examined in the changes file. Now that the release is out, the QtWebKit team is busy again fixing bugs and backporting important fixes for the next patch release (4.5.2). Expect to see more extensive changes there. Few QtWebkit-related examples which I have written are also being cleaned-up and imported as new Qt examples, as we speak.

Wednesday, April 22, 2009

Still about color wheel

This is the follow-up to what I wrote before: hue subdivision for mortals.

Seems everyone echoes my sentiment: increasing the coverage area of green is not the right way to go. The easiest explanation is as follows. Since this is an additive color model, due to the higher sensitivity of green, its contribution to other primary colors should be reduced. Effectively, this means we should shrink the green region in the color wheel:

For the "Mortal" version in the above picture, I modified the conversion from hue to RGB (assuming fully saturated color), because I discarded the idea of curve-fitting to map the angle to the hue value. Another change is that I gave up keeping the triangle of the primaries, i.e. while 0 is still red (as an arbitrary reference), 0.333 is not green anymore. The actual position of a color component is now determined by the inverse proportion of its part to the grayscale function. I arrive at 26% red, 17% green, and 57% blue. Unsuprisingly, it means blue now occupies most of the space.

Under each wheel, shown also colors taken from the color wheel, if it is equally divided into eight parts. The result for "Droid" is probably familiar for a lot of people. Comparing it to the "Mortal" version gives an interesting insight. As can be predicted, now the contribution of green is less dominant. Indeed, blue shades are apparent in few more colors. In fact, this arises a problem. The light and dark blue colors (in "Mortal") look too similar. Compare to the light and dark green (in "Droid"). Maybe this is because the weighting factors of 26:17:57 are completely busted? But then, how shall I come up with nice weighting factors?

Seriously, maybe I should just stop trying all this with an additive color model...

Tuesday, April 21, 2009

On hue subdividision for mortals

The use of HSV/HSL color space is obvious when we need to have several colors distributed in an optimal way, colors as unique as possible. For example, SpeedCrunch uses it to autogenerate the colors used for the syntax highlighting feature. The details behind its algorithm was already described by Helder in his Qt Quarterly article Adaptive Coloring for Syntax Highlighting. Basically we use the color wheel and subdivide the hue into equal parts. Primary additive color components are red, green, and blue. This distributes the colors in maximum angular distance with respect to the hue values.

So far so good. However, it was known that human eyes are generally more sensitive to green than other colors. In computer graphics, this is often manifested in the grayscale function, i.e. the function that converts RGB to a grayscale value. Take a peek at Qt's qGray(), it gives the red, green, and blue the weighting factors of 11, 16, and 5, respectively. Shall we take this into account when we subdivide the hue?

If this theory holds, it actually means that a change of shade in the green region should give more perception of change to our eyes then e.g. the same change of shade in the blue region. Another way to say it: the same amount of color difference (to our eyes) corresponds to different angular distances (in the hue component, in HSV/HSL color space) in the green and blue region. Hence, if we want to subdivide green, we can have a smaller spacing there compared to the case where we want to subdivide blue. A simpler way to do it would be to stretch the green region so that it is wider than blue. That way, we just subdivide the color wheels with equal spacings and overall we still get more contributions from green than other components. This is illustrated in the following picture. It will be more "human-friendly", won't it?

Here is a detailed explanation. Suppose a (in the range 0..1) denotes the angular distance relative to a reference. For the purpose of this analysis, assume a=0 means red, 0.333 means green, and 0.667 means blue. This is a 1:1 mapping to the the normalized hue value (in HSL/HSV color space). It is exactly what is shown in the "Machine" version of the color ring in the above picture. On the right, the "Human" version, a=0.333 still means green, same for 0 (red) and 0.667 (blue). However, we see that the yellow color (roughly marks the transition between red and green) is in a different position, same for cyan and magenta. Overall, the coverage area of green is larger, analog to (like previously described) 50% contribution of the green component to the grayscale value. This means that the mapping between a and hue gets more complicated.

A simple solution is to have a custom interpolation between red and green, green and blue, and blue and red. In the case of "Machine", any value a between 0 and 0.333 corresponds to a linear combination between red and green, and thus the middle point (yellow) sits at a=0.167. For the "Human" version, this is not the case anymore. The distance between yellow-red and yellow-green has a proportion of 11 and 16. Thus, yellow sits at a=0.136. If we continue for green to blue and blue to red in a similar fashion, we will arrive at the complete mapping between a and hue.

I decided to take another route. After few minutes experiment with different curve fitting methods, here is an interesting mapping function:

hue = (1.39 - a * (4.6 - a * 4.04)) / (1 / a - 2.44 + a * (0.5 + a * 1.77));

that is exactly the one I used to produce the image of the color rings above. You still need to take care of avoiding divide-by-zero (or rewrite it to avoid division: left as a 5-minute exercise to the curious reader), but otherwise the function is smooth and fast enough to execute on modern machine. Isn't math cool?

Of course, take this with a pinch of salt: likely I make a lot of gross approximation and model simplification.

Personally I still doubt that this will make a big difference. Afterall, you can hardly distinguish two saturated colors when they have a hue distance less than 0.1. They just look the same, unless we play with the saturation and value. We can even attack it from a different point view: since a bit of shade of green provokes our eyes more than blue and red, should not we shrink the green region instead, and thus effectively reducing its contribution? Or maybe we need to use the concept with a different approach? Or let us just forget it and use subtractive color model instead?

Comments? Ideas? Flames?

Saturday, April 04, 2009

this is the world that we live in, the Python world!

It's been one year I work for Qt Software (nee Trolltech). Two big releases: Qt 4.4 and Qt 4.5. Qt for S60. LGPL-ed Qt. Graphics Dojo. Going to Munich and Redwood City for DevDays. Things are exciting as ever.

In one month, I will be in Florence (Italy) for PyCon Italia. I'd have one technical talk: Advanced Graphics Programming with PyQt, see the abstract for details.

Check also other interesting talks in the schedule. For example, don't miss PyQt for Desktop and Embedded Devices by our Python+Qt guru, David Boddie. And yes, I would not dare to skip Guido von Rossum's keynote on Python 3.0.

If you will be around and want to have a snack or a chat, just let me know!

Monday, March 23, 2009

what you see is important, how you see it is even more

In case you miss it, Benjamin just added Google Suggest to Arora, within hours after I showed how to do it in Qt Labs. His BSD-licensed Google Suggest implementation is very lightweight, it is pretty trivial to integrate it to most common applications.

Screenshot follows (click to enlarge):

Friday, March 20, 2009

I was blindfolded but now I'm seeing

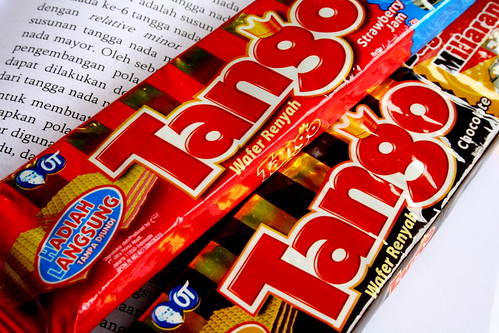
Two (old) tricks for the price of one. Well, since it takes two to Tango anyway.

The first is to make your window movable by dragging, especially if the window does not have a title bar (remember the classic WinAmp?) or use a custom-drawn one (Google Chrome is the prominent example here). To make the challenge more difficult, no change to the main window code is allowed. To reveal the secret (which is a matter of using event filtering properly), go to my Qt Labs blog entry: Moving top-level window by dragging.

To see it in action, peek at the following screencast (alternatives: YouTube, blip.tv, 3.7 MB Ogg Theora).

The second is about Google Suggest. Almost all browsers have supported it. For a minimalistic example on how to do it, check out my other Qt Labs blog on Google Suggest made easy. The demo launches your default browser with the chosen search term, with or without autocompletion.

The proof lies in this short screencast (alternatives: YouTube, blip.tv, 450 KB Ogg Theora).

(It is evident that my default browser is Konqueror. I told you I am not that biased :-)

Now just like last time, who is going to turn this into a plasmoid?

it takes two to tango

tango

Thursday, March 12, 2009

I can see it's coming, like a serenade of sound

The initial version of WYSIWYG editor based on QtWebKit (see my post on Qt Labs for details) apparently works pretty well. There are rough edges here and there, something which need fixing, but overall I am quite happy. Live editing a web page opens a whole new possibilty. For an HTML-based help system, you can offer annotation feature, where the user can add his own note right inside the documentation (you may want enable editing on certain parts, not the whole document). You can make a note-taking system that copies something from the web (in HTML) and then the user can touch the content to adjust it to his need. Translate web pages easily, with all the formatting and whatnot intact, and without the need to scare the translators with raw HTML black magic. Any more useful examples?

Screenshots follow. Click on each image to enlarge.